
Add a new operation to a process flow
When you add a new operation to a process flow, there are multiple ways to configure the operation's parameters, settings, and overall behavior in the process flow.
Log into FactoryLogix Office.
Select Process Engineering
 > Define Processes, then create a new assembly or assembly revision.
In the Process Definition window, double-click Process Flow in the Process tree.
A padlock icon indicates that the process is checked out for editing.
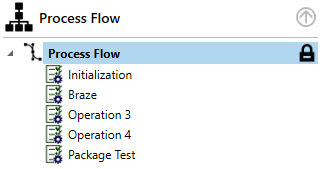
Do one of the following:
Under Current Flow on the right side of the window, select Add
 > Operation.
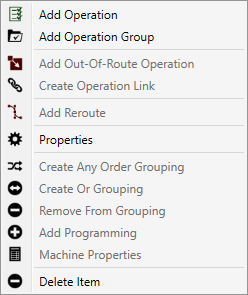
Right-click an existing operation in the process flow, then select Add Operation from the menu.
In the New Operation dialog, enter a Name for the operation.
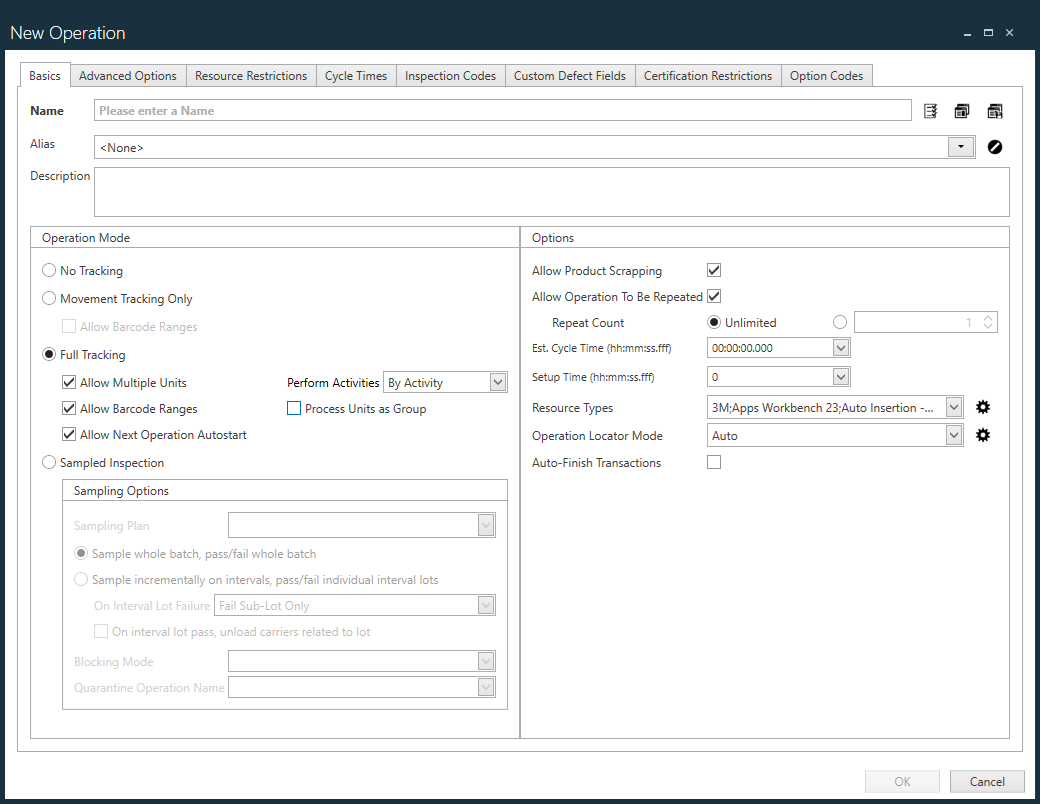
There are multiple tabs with options to help you define an operation: Basics, Advanced Options, Resource Restrictions, Cycle Times, Inspection Codes, Custom Defect Fields, Certification Restrictions, and Option Codes. Review the tables following this procedure to understand the options for an operation before making your selections.
Note
Option codes are only used with Configure To Order (CTO) assemblies, so if your assembly in not a CTO assembly, the Option Codes tab won't display. See Option codes for configurable assemblies for more information.
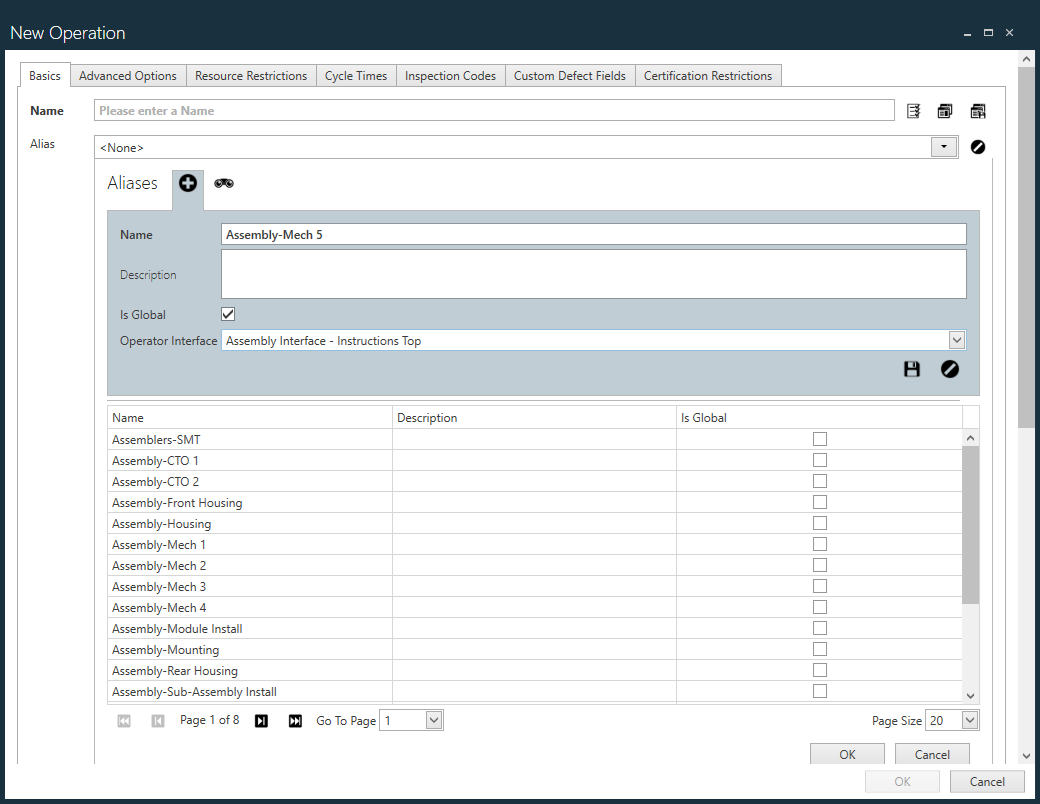
On the Basics tab, enter a Name for the operation. (This is the only required field for an operation.)
Make the desired selections for the operation on each of the tabs (Basics, Advanced Options, Resource Restrictions, Cycle Times, Inspection Codes, Custom Defect Fields, Certification Restrictions, and Option Codes).
When you finish making selections in the New Operation dialog, select OK to return to the Process Definition window.
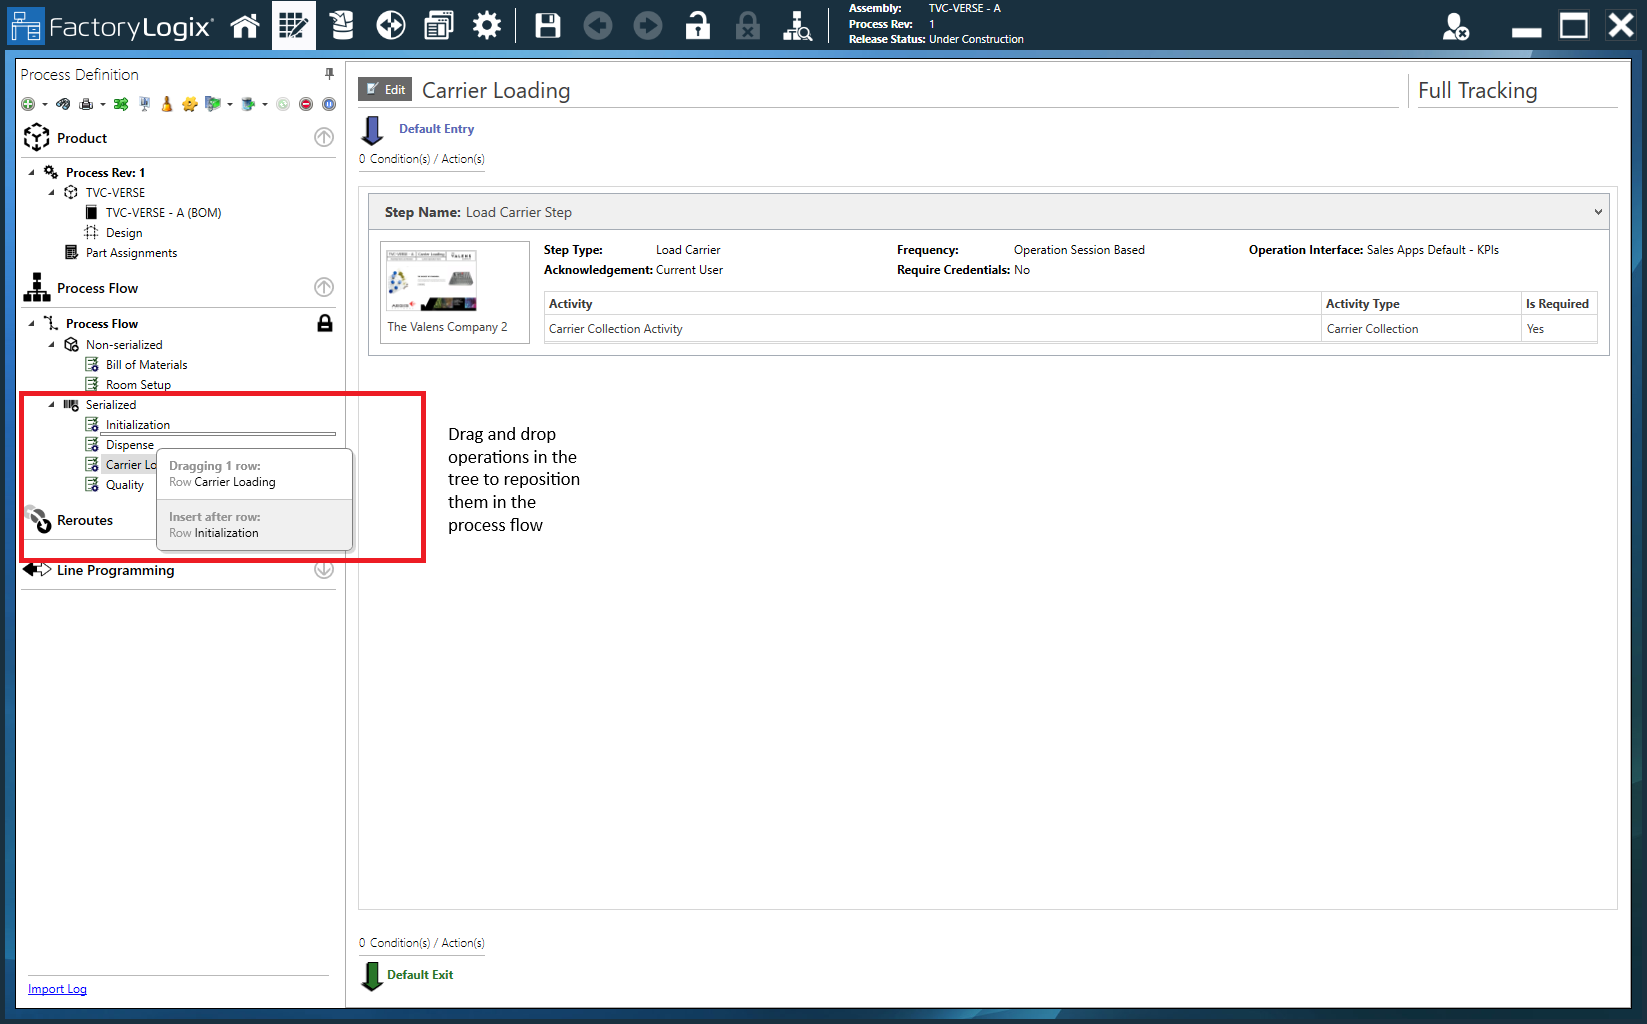
The Current Flow area of the window displays a graphical representation of the process flow with the new operation you added.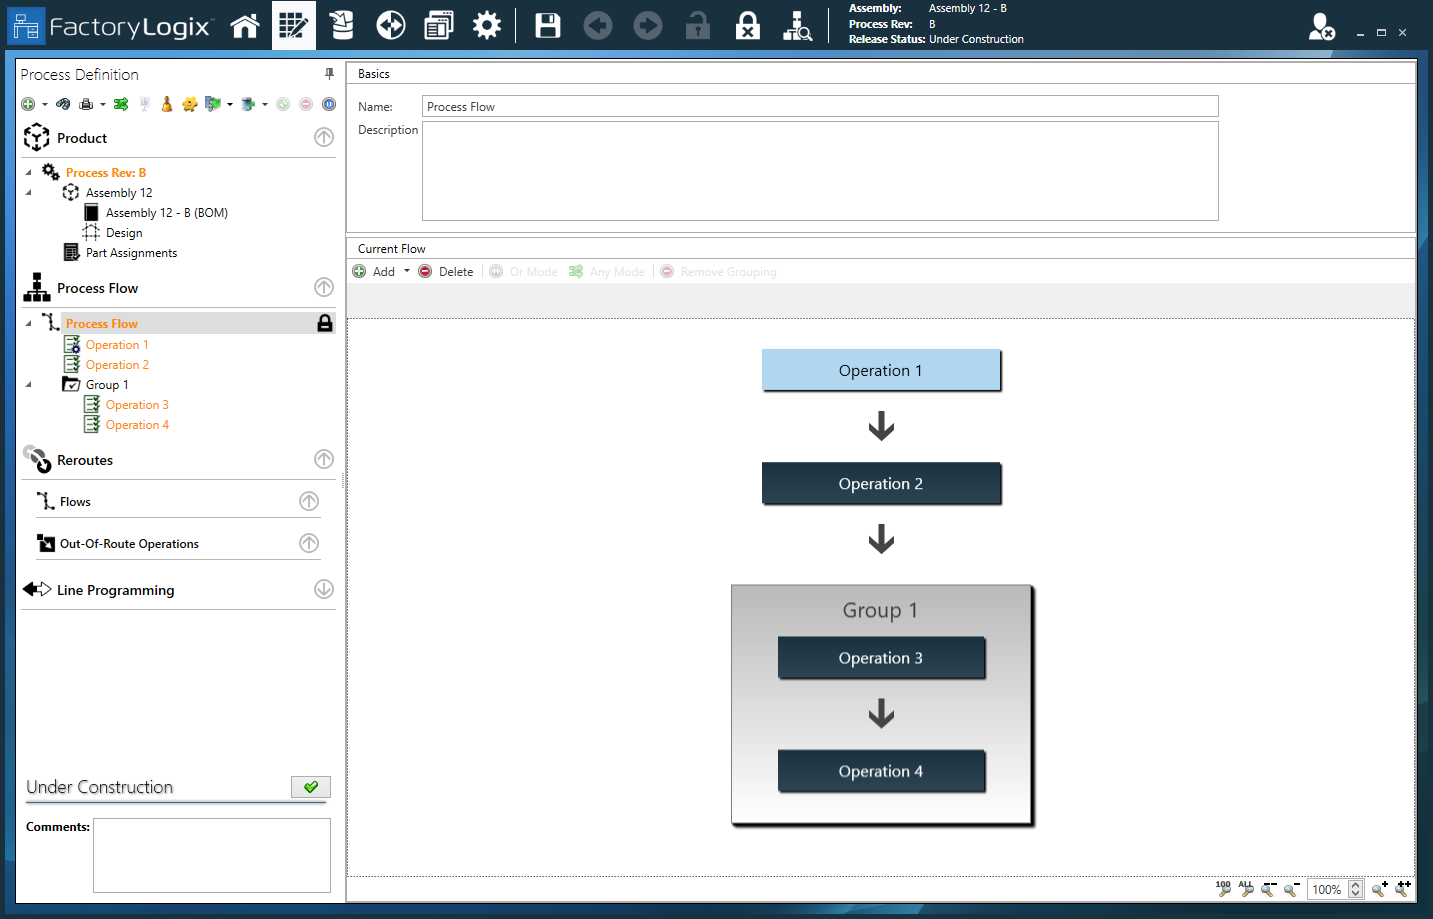
(Optional) To rearrange the order of operations in the process flow, drag an operation to a new location in the process flow.
Note
If you exit a new operation and want to edit it later, just double-click Process Flow in the tree to check it out for editing, right-click the operation you want to edit, then select Properties. You'll notice that the title of the New Operation dialog has now changed to Update Operation.
Basics tab
On the Basics tab of the New Operation dialog, you specify essential information about an operation such as its name, tracking mode, and advanced options such as whether the operation can be repeated and what happens when the operation finishes.
The following table describes the options on the Basics tab of the New Operation dialog.
Option | Description |
|---|---|
Name | Specifies the name of the operation. (This is the only required field for an operation.) |
Alias | Operation aliasing allows process engineers to group similar operations from one or more process flows for reporting purposes. For example, several inspection operations such as AOI, manual inspection, and final inspection could all be assigned an Alias of Inspect. Once assigned, reports can be generated against the Inspect alias that takes all three operations into account instead of having to specify each operation manually in the report.
Note Global operation aliases are used to define global operations accessible from FactoryLogix Operations. If you don't use global operations, you do not need to define any operation aliases as global. If you do use global operations, you need to define these aliases as global and also associate an appropriate Operator Interface template to make the global options available. See Global operation aliases for more information.
 |
Description | Provides a description of the operation. Tip Although optional, it is very useful to provide a detailed description of the operation so that anyone looking at the process operations will understand the purpose and scope of the operation. |
Operation Mode |
Note Touch time is the total time that a unit is started at an operation and not in a paused state.
When a sampling plan with the failed outcome set to Block and/or Quarantine is selected in a sampling operation, two additional configuration settings are available: Blocking Mode and Quarantine Operation Name.
Note For more information about using sampling plans, see Add a quality sampling plan and Sampled inspection operation settings. |
Options |
Note Cycle time is the complete time a unit has been at an operation. It begins when the unit is first scanned into an operation and stops when the unit is finished. Pausing the unit does not stop the cycle time count.
Note
|
Advanced Options tab
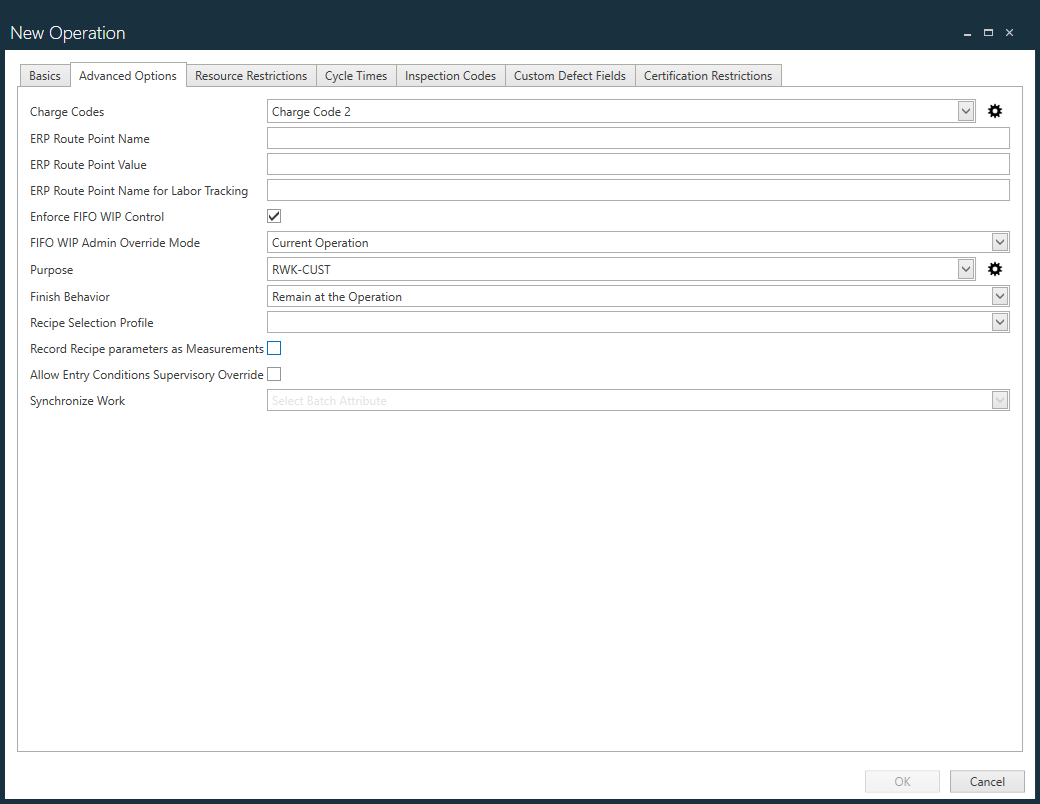
On the Advanced Options tab of the New Operation dialogg, you specify charge codes, ERP route point details, and determine whether the operation should use FIFO WIP control. You can also specify a batch attribute to synchronize work for an operation.
Option | Description |
|---|---|
Charge Codes | Use the Charge Code drop-down to select the charge codes you want to apply to this operation. Select the Edit Charge Codes 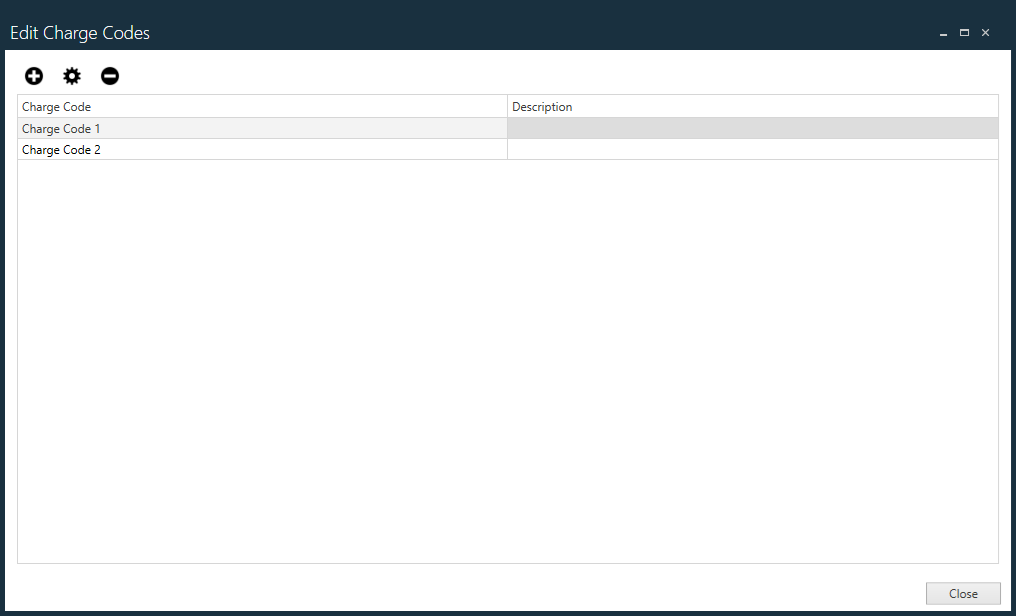 Use the Add |
ERP Route Point Name | Used with the FactoryLogix xTend Integration FLX-XTD-WIP-01 (WIP Data Export) to tie FactoryLogix operation names to the corresponding ERP route point in your ERP system. ERP systems might use a simple text name, a numeric or alphanumeric value, or a combination of the two. |
ERP Route Point Value | Used with the FactoryLogix xTend Integration FLX-XTD-WIP-01 (WIP Data Export) to tie FactoryLogix operation names to the corresponding ERP route point in your ERP system. Some ERP systems use a simple text name, some use a numeric or alphanumeric value, some use a combination of the two. CNC_CUTTING (machine operation) and FINAL_QC (Quality Control inspection) are two examples of possible ERP route point names used in manufacturing. |
ERP Route Point Name for Labor Tracking | Used with the FactoryLogix xTend Integration FLX-XTD-WIP-01 (WIP Data Export) to tie FactoryLogix operation names to the corresponding ERP route point name used for labor tracking in your ERP system. |
Enforce FIFO WIP Control | Enforces First-In-First-Out WIP control of the operation when selected. |
FIFO WIP Admin Override Mode | Controls override permissions for First-In-First-Out WIP control of an operation. None - Prevents any overrides from occurring. |
Purpose | Allows you to create a new reason code or select an existing reason code for this operation. (See Add, delete, and manage reason codes for more information.) When you select the Edit Reason Codes Use the Category drop-down to select a new reason code from a different category. |
Finish Behavior | Specifies what happens when this operation is finished in production: Remain at the Operation or Return to the Home screen. |
Record Recipe parameters as Measurements | Saves recipe parameters in the FactoryLogix database. You can view these measurements in the Trace window in FactoryLogix Operations or in DataMiner. |
Allow Entry Conditions Supervisory Override | Limits the number of times an operation can be repeated. When selected, this check box allows a supervisor to override the system when the system determines that work cannot commence due to a failed entry condition. |
Synchronize Work | Allows you to select a batch attribute for the operation that will be used to control the work to be synchronized in FactoryLogix Operations. This option allows the operator to control of the units they work on in production. The Synchronize Work option ensures that all related items perform a common operation simultaneously (painting or hardware installation, for example) and ensures the work is synchronized across all batches with that common operation. The common operation is only performed once and greater efficiency is achieved since the same material lot is only used once across multiple units in the common operation. After the common operation is completed, units in different batches can continue to complete their individual process flows in FactoryLogix Operations. (See Cross-order process synchronization for additional information.) Important The Synchronize Work drop-down is only available for operations that are defined as Full Tracking on the Basics tab of the New Operation dialog. (Movement Tracking Only, No Tracking, and Sampled Inspection operations cannot be synchronized.) |
Resource Restrictions tab
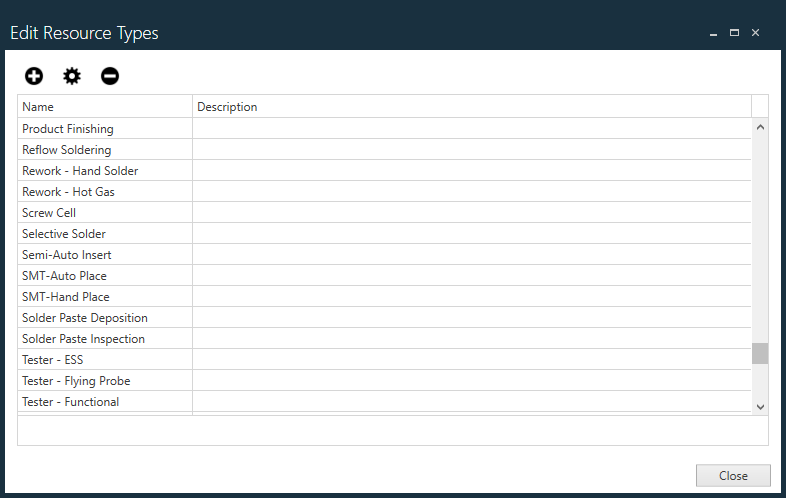
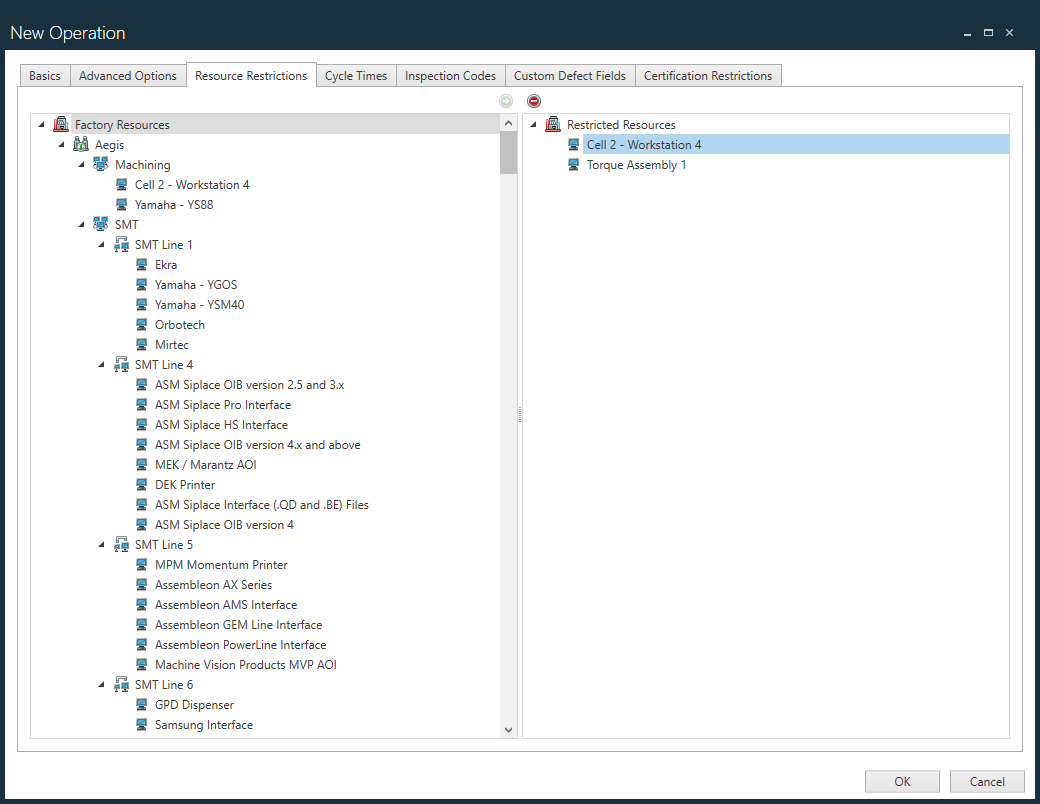
The Resource Restrictions tab shows the factory resources that are restricted for this operation. For example, an operation may require one or more specific factory areas or specific workstations, machines, or computers in order to be completed. (See also Create a factory and set up factory resources.)
To restrict a factory resource for this operation, select the resource on the left side of the window, select the Send to Operation
button to move the resource to the Restricted column, then select OK.Use the Remove From Operation
 button to remove a restricted resource from the list.
After you make your selections, select OK to return to the Process Definition window.
Cycle Times tab
The Cycle Times tab displays the estimated cycle time for an operation to be completed and the estimated setup time for the operation (in seconds). These estimates help in planning the duration of each operation and the overall manufacturing process duration.
Use the Est Cycle Time (s) column to specify the estimated cycle time for a workstation.
Note
Cycle time is the complete time a unit has been at an operation. It begins when the unit is first scanned into an operation and stops when the unit is finished. Pausing the unit does not stop the cycle time count.
Use the Setup Time (s) column to enter the setup time for a workstation in the format hh:mm:ss.fff.
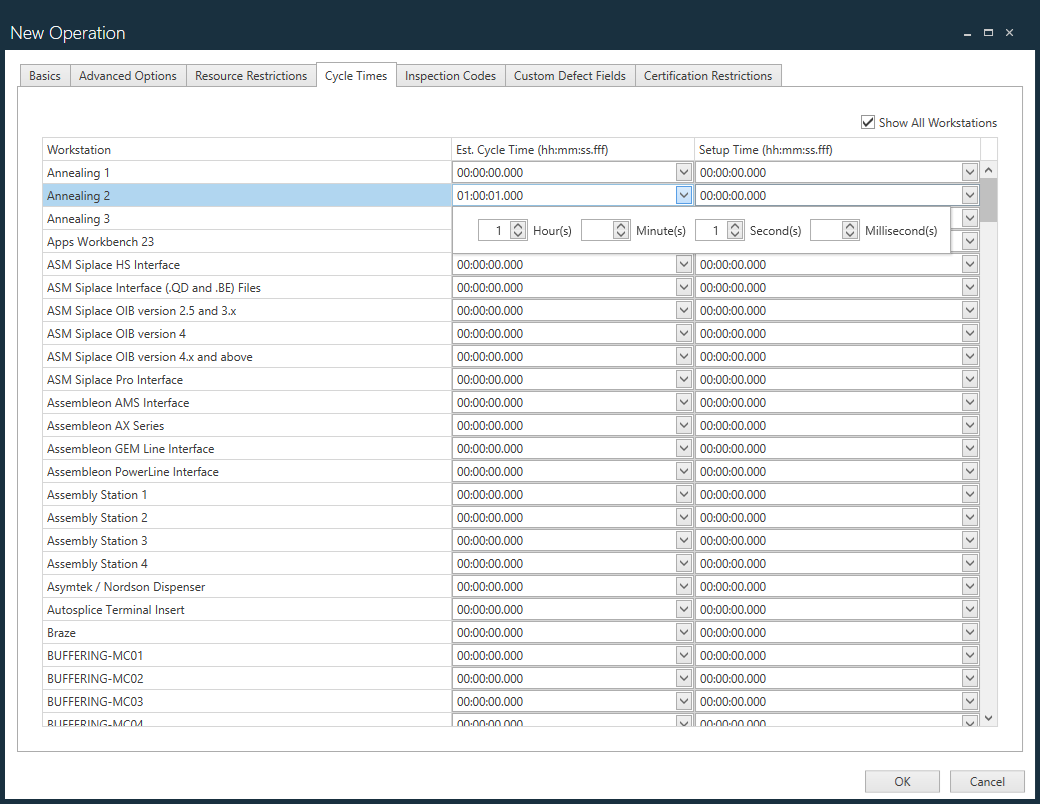
(Optional) To view cycle times for all workstations, select the Show All Workstations check box.
Select OK to save your changes and return to the Process Definition window.
Inspection Codes tab
The Inspection Codes tab allows you to select the inspection codes to be used for the current operation. (See Create and manage inspection codes for details about how to create and manage inspection codes.)
Use the check boxes on the left side of the window to select the inspection codes you want to apply to the current process.

(Optional) Select the Select All
 icon to select all available inspection codes.
(Optional) Select the Clear All
 icon to deselect all selected inspection codes.
If an inspection code has an accompanying image to aid the inspection process, select the icon in the Image column next to the inspection code to view the image.
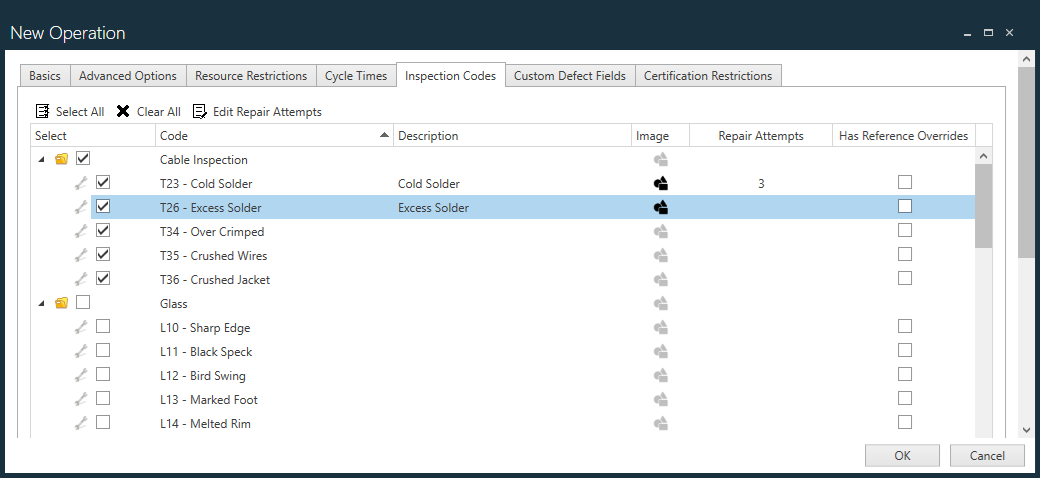
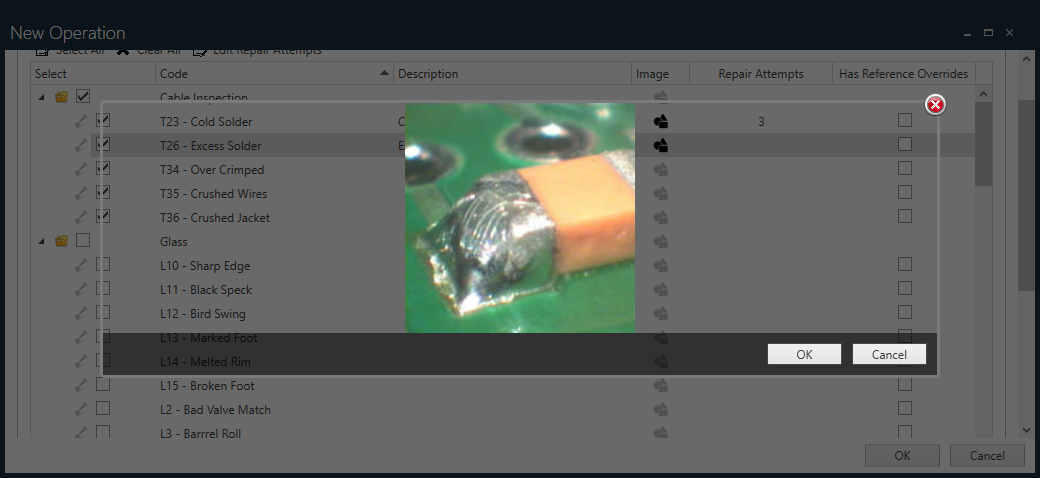
After you select all applicable inspection codes for the current operation, select OK.
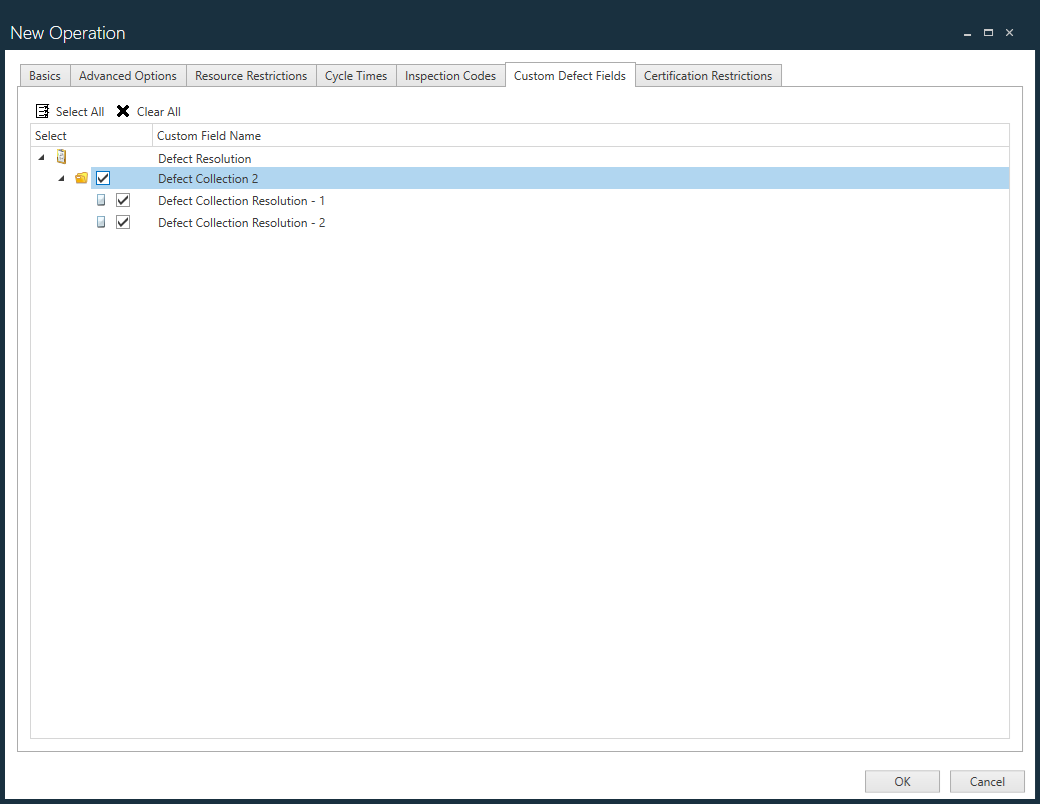
Custom Defect Fields tab
The Custom Defect Fields tab allows you to select custom fields that are not time-based to apply to the operation you are defining.
These custom fields are defined the same way as for Defect Collection custom fields; that is, each of the operation custom fields is defined to be able to record a simple text value or a value selected from a customer-defined list of values. See Define and manage custom fields for details about how to create and save custom defect fields.
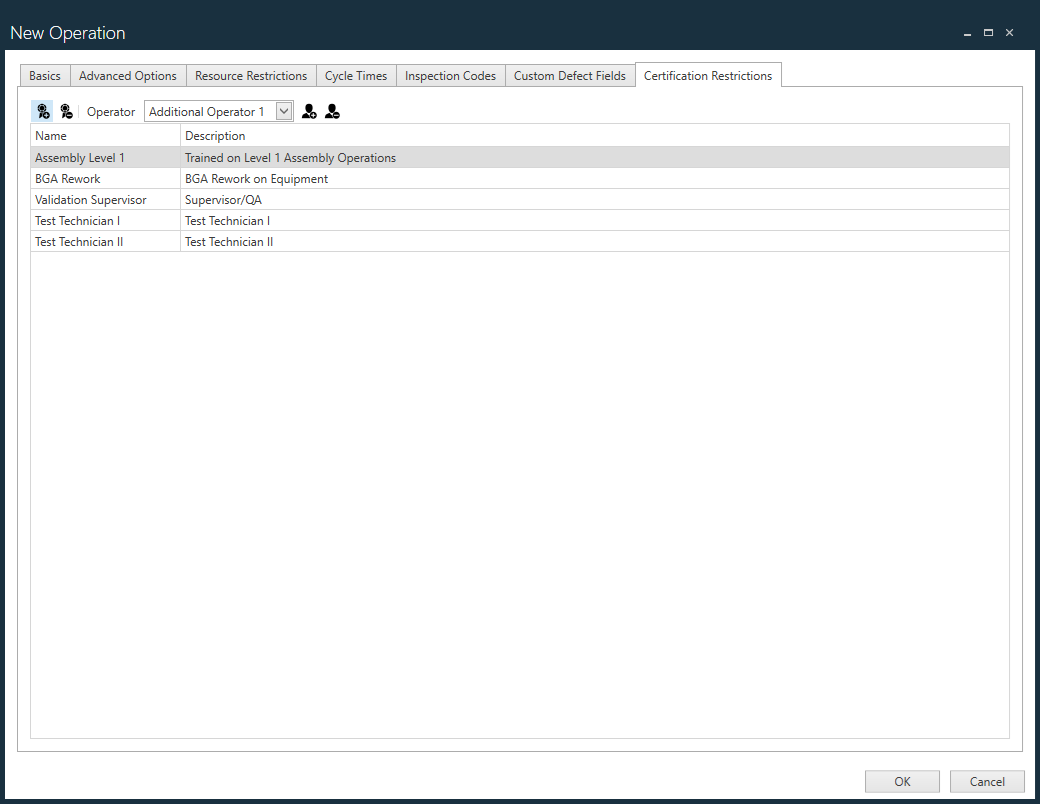
Certification Restrictions tab
The Certification Restrictions tab allows administrators to specify whether one or more additional operators are required to sign in when the operation is in process in FactoryLogix Operations.
Different certification restrictions can be specified for each operator; when you specify a certification restriction, only those operators with the specified certification may process assemblies at the selected operation.
In FactoryLogix Operations, the Primary operator opens an operation, but if additional operators are defined for that operation, the system prompts those operators to sign in. After all additional operator sign-ins are entered and accepted, the Primary operator (the operator currently logged into FactoryLogix) can then start working on units. Each additional operator is validated by correctly entering a FactoryLogix user name and password and they must have the required certifications and those certifications must be valid. All operators (primary or additional) must have all of the required certifications. For example, an operation requiring Certification A and Certification B means that the operator must have both certifications, not just either of the two.
Note
The rights to manage certification restrictions are controlled by the FactoryLogix administrator in the Users and Roles area of FactoryLogix Office. See Select default user role permissions for more information.
Note
You can add certifications to individual user profiles in FactoryLogix Office > System Configuration > Users and Roles. See Create a user for more information.
Select the Add Certification
 button.
In the Certifications dialog, select one or more certifications required for this operation, then select OK.
Tip
Use Ctrl+click or Shift+click to select multiple certifications for an operation.
The certification required for the Primary operator is displayed.
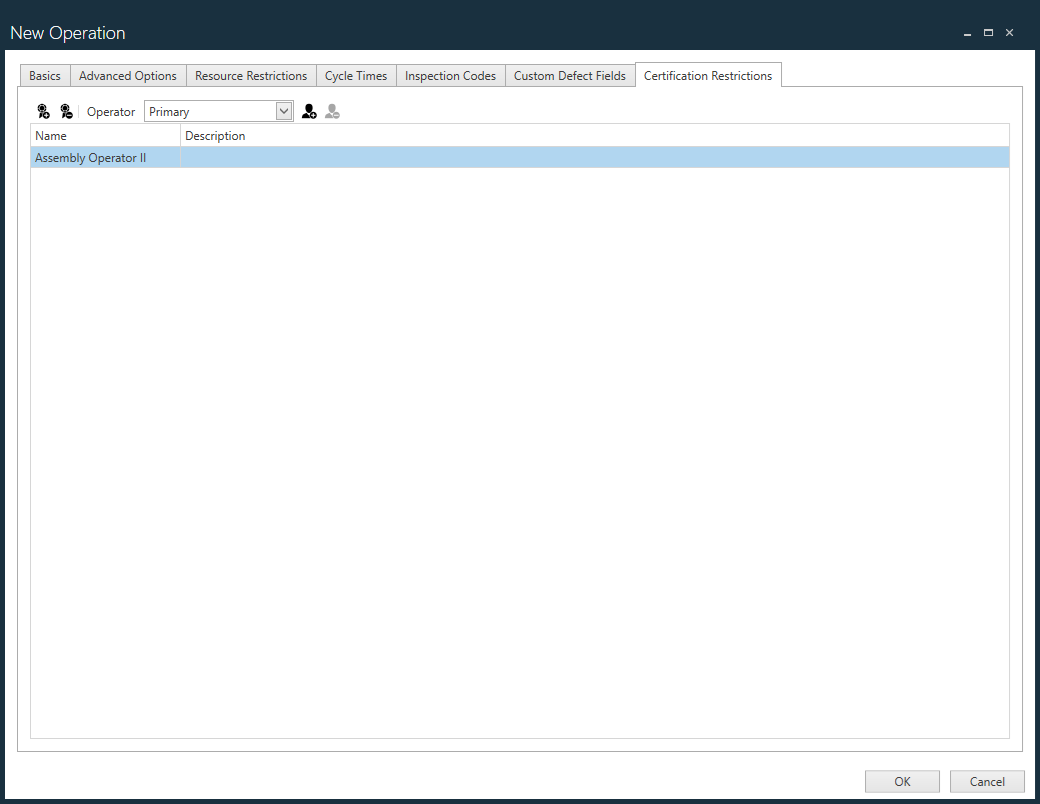
To add additional operators to this operation, select the Add Additional Operator
 button.
Each additional operator is added using sequential numbering (Additional Operator 1, Additional Operator 2, and so on).
To remove an additional operator, select the operator name from the Operator drop-down (Additional Operator 3, for example), then select the Remove Additional Operator
 button.
Note
You cannot remove the Primary operator.
To add one or more certifications for an additional operator, select the operator name from the Operator drop-down, select the Add Certification
button, select the desired certifications for this operation, then select OK.
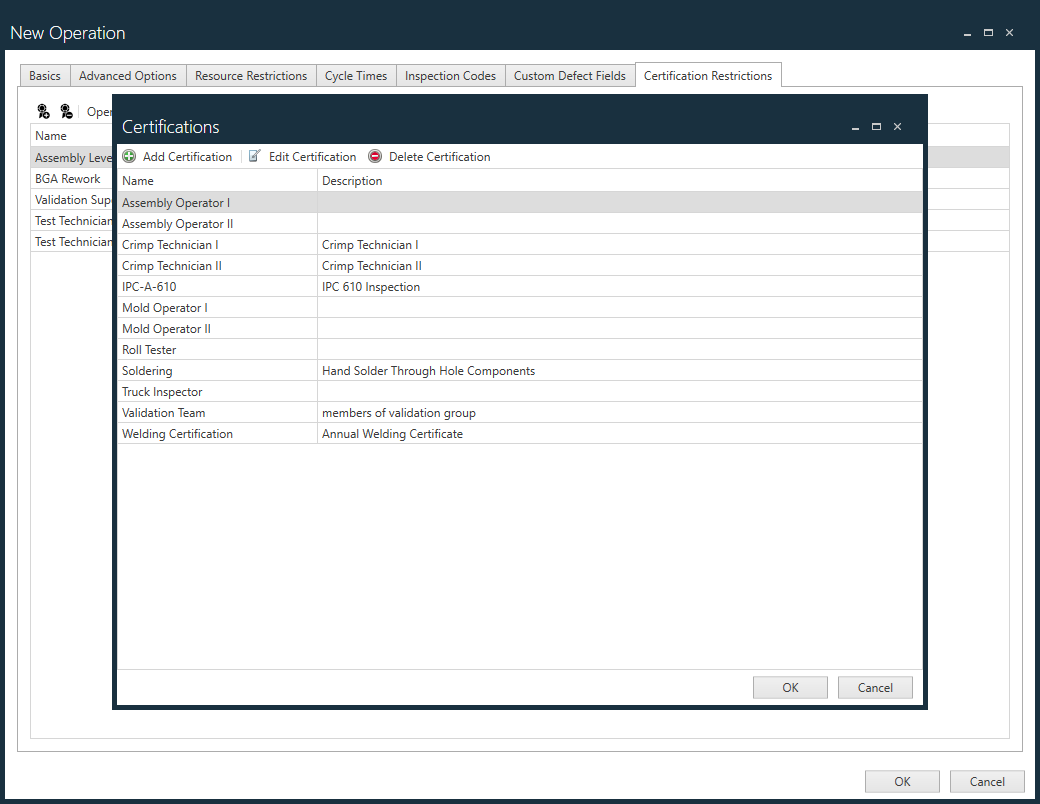
Add, delete, and edit certifications
While working on the Certification Restrictions tab, you can also manage certifications globally.
Important
You must have administrator rights to add, delete, or edit certifications. (If you don't have the appropriate rights, you won't see the Certifications tab.)
Any certifications you add, delete, or edit in the Certifications dialog will be reflected in the FactoryLogix Office > System Configuration > Users and Roles area where certifications are assigned to individual users/operators by the FactoryLogix administrator. For example, if you delete a certification, it will be removed from all users it is currently assigned to.
From the New Operation dialog, select the Add Certification
button.In the Certifications dialog, select the Add Certification
 button to define a new certification.
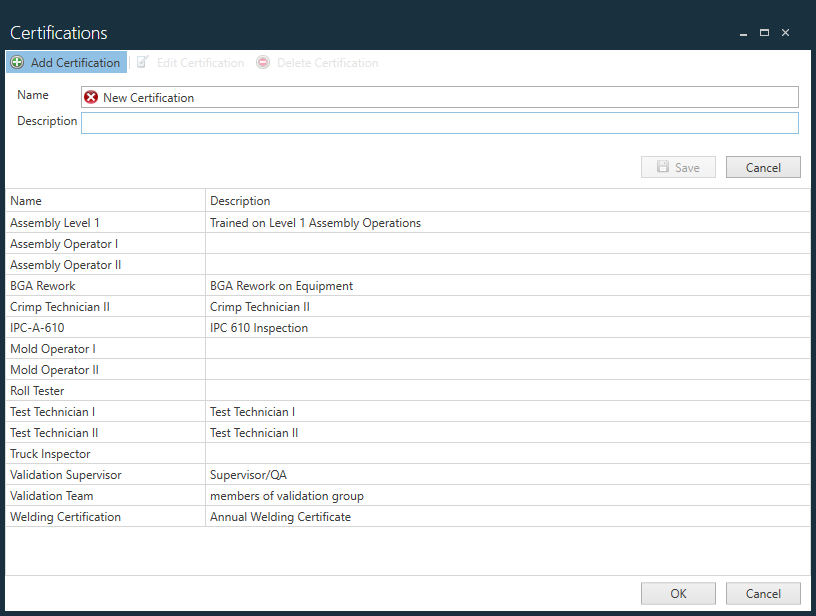
Enter a Name and Description for the new certification, select Save, then select OK.
To delete a selected certification, select the Delete Certification
 button, then select Yes when prompted to delete the certification.
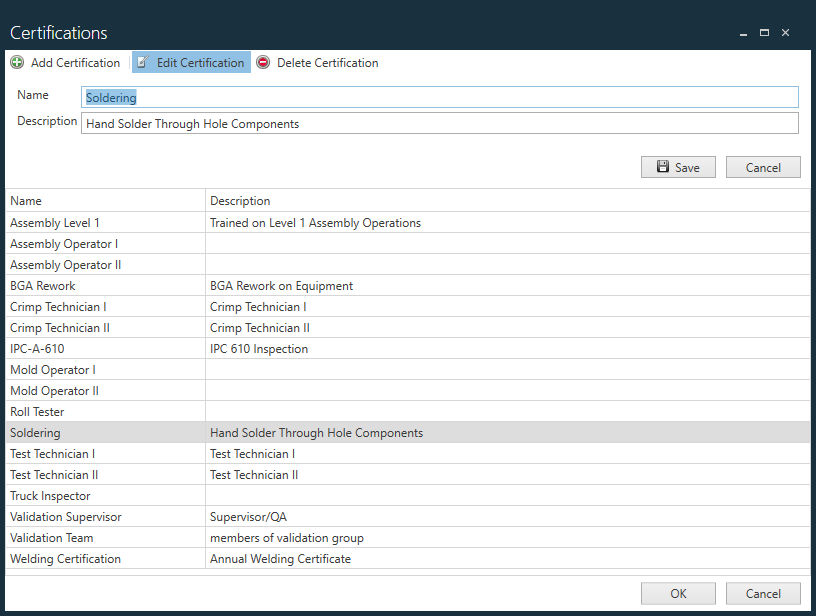
To edit a selected certification, select the Edit Certification
 button.
Make the necessary changes to the Name and/or Description of the certification, select Save, then select OK.
Note
See the Additional Operator Automatic Logout Time option in the FactoryLogix global options topic (Production Portal category) for information about setting the logout time for operators.