
Appendix
Logging
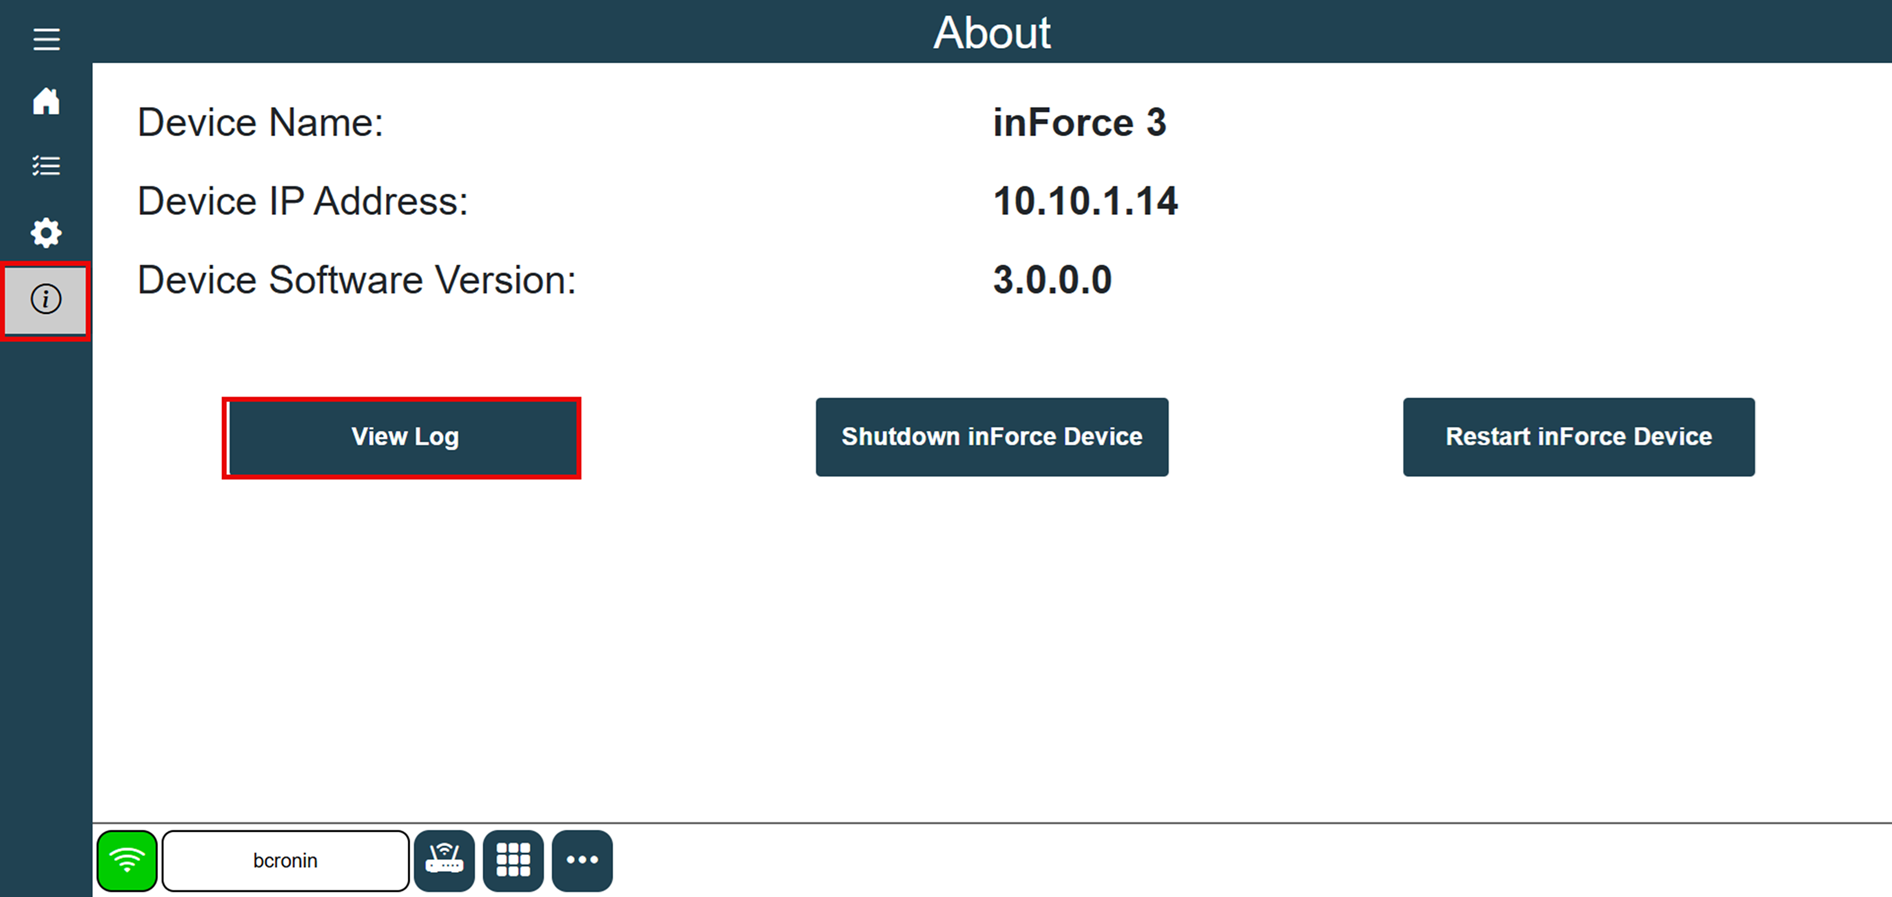
There may be instances where device logs are needed for troubleshooting purposes. There are two methods for retrieving the device logs from inForce. The first method is on the device itself from the About screen.
Select the About icon in the left navigation bar and then select the View Log button.

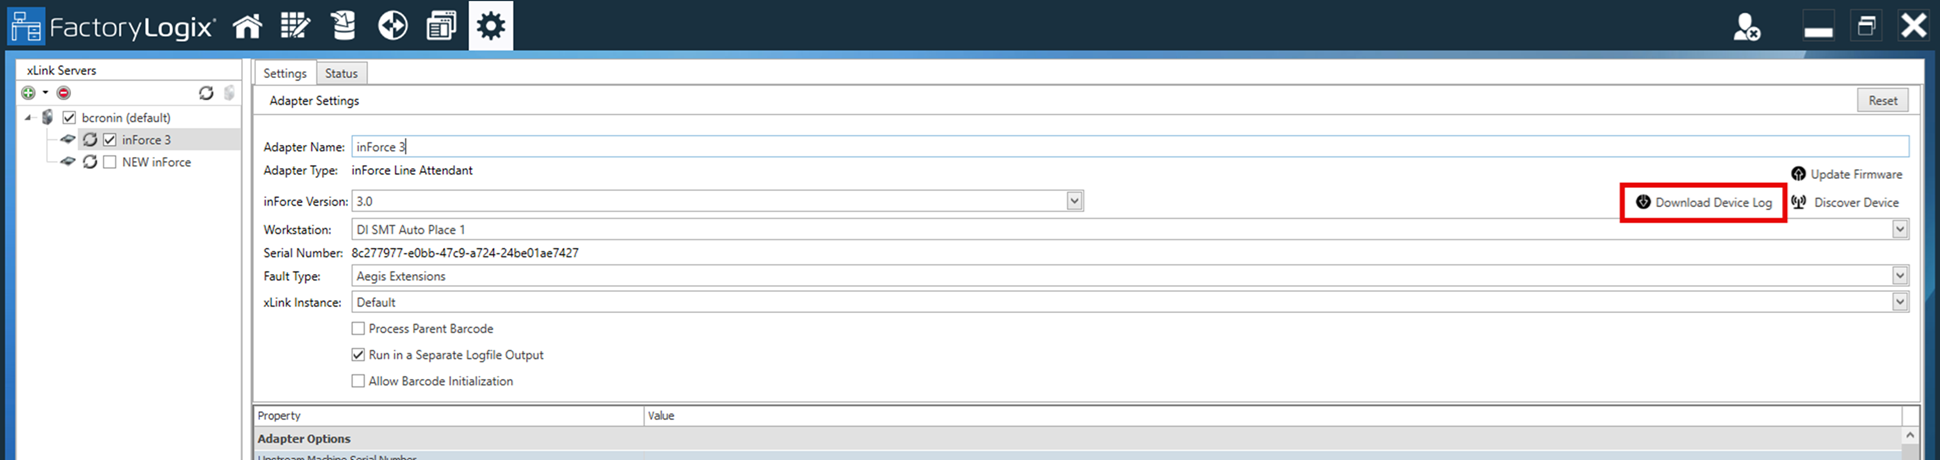
The second method for retrieving the device logs from inForce is from the xLink Adapter Settings window in FactoryLogix Office:
Using SSH or a Linux terminal window for OS access
If you need to access the command line interface of the Raspbian OS for maintenance or IT purposes (such as updating the unit with security patches or setting a static IP address as opposed to using DHCP), do the following:
Connect an HDMI monitor and keyboard to the inForce unit.
Select Ctrl-Alt-T on your keyboard to open a Terminal window.
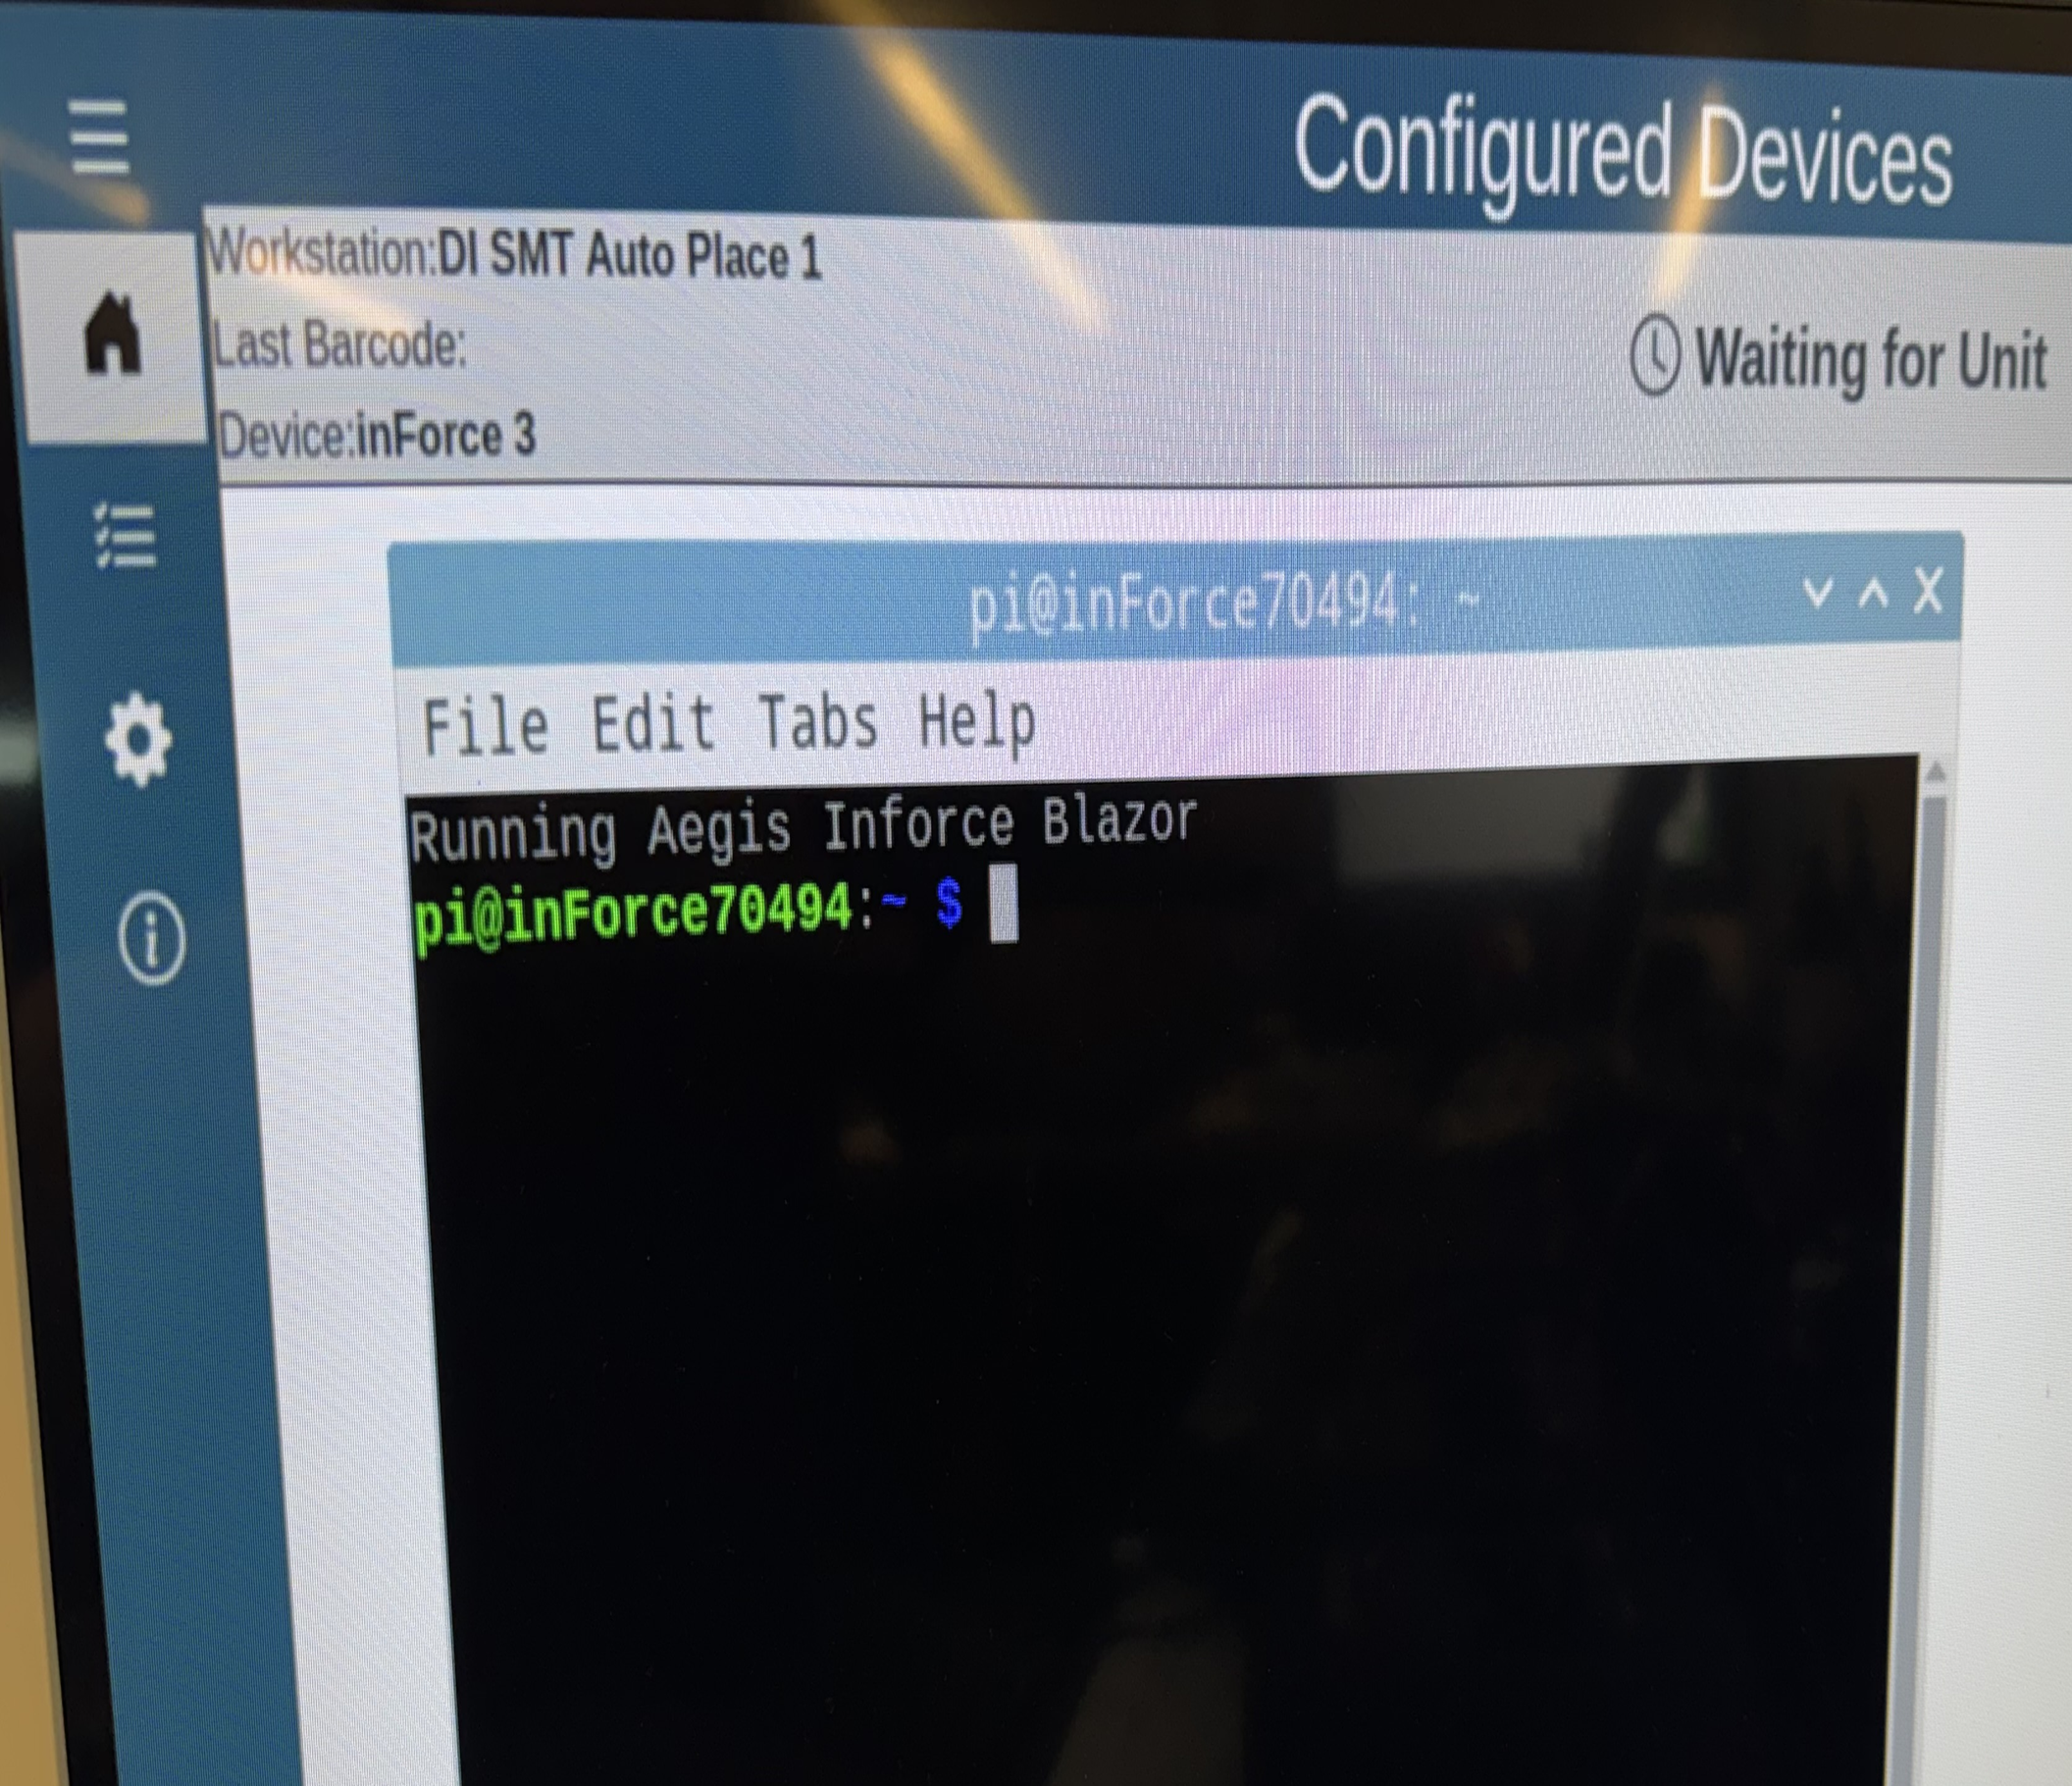
(Optional) You can leave the inForce application entirely and start an SSH session by selecting Ctrl-Alt-F6 on your keyboard. (The username and password are both: pi.)
Select Ctrl-Alt-F7 o return to the inForce application in kiosk mode (no access to the desktop).
Key maintenance tasks
Updating the Raspbian OS
From the command line, enter the following two commands in order:
CODEsudo apt update sudo apt full-upgrade
Setting a static IP address
In some cases, you may wish to assign a static IP to the inForce rather than letting DHCP assign one. There are two steps to this process.
From the command line, invoke raspi-config.
CODEsudo raspi-configSelect Advanced or Network config and look for Network Options. There should be two choices: dhcpcd and Network Manager.
Select Network Manager and Save.
The device will prompt you to reboot.After the reboot, open the Terminal window again and enter the following command:
sudo nmtuiThe Network Manager tool will allow you to assign a static IP for the network interface eth01.
Display resolution setting
This may be configured in the raspi-config tool as well.
Flashing a new SD card
The operating system and software which drive inForce are stored on an internal SD card. Four Philips head screws on the bottom of the inForce unit are all you need to open the device.
Note
Use standard ESD protection when working inside inForce.
If you are upgrading inForce 2 to inForce 3, you may want to label and save the inForce 2 SD card in the event you need to revert to the inForce 2 software.
Before you begin, you will need to gather a few things:
A high-performance SD card of at least 16GB (U1, Class 10)
The inForce 3.0 SD Card image from Aegis
A laptop or desktop PC with an SD Card slot or a USB to SD adapter
The BalenaEtcher SD Card writing tool https://etcher.balena.io/
Note
Use of any other imaging/SD card writing tool may cause problems.
Flashing instructions
Install BalenaEtcher.
Insert the new SD card into the PC.
Launch BalenaEtcher.
Flash from File, select the inForce image file provided by Aegis.
Select the SD card as the Target (be certain you select the correct drive!).
Select Flash.
BalenaEtcher will write the image to the SD card and then verify what was written.Safely eject the SD card using Windows File Explorer.
Insert the SD card back into the inForce unit, making sure it clicks and locks in place.
Reassemble inForce and connect the HDMI, peripherals, and power to boot.